 Welcome to the first of my new series of blogs on encapsulation resins, I am going to focus on the all-important subject of resin selection, types of chemistries available and their properties, application, mix and cure. First, though, let me introduce myself. I’m Beth Turner and have worked for Electrolube for 5 years, starting as a member of the Global Technical Support Team. I’ve spent my career to date as a Research and Development Chemist, working on adhesives, resins and conformal coatings at Apollo Chemicals before moving to Electrolube, and have previously worked on specialist projects including bio-functional nano-coatings and coatings affording protection to electronics in harsh environments.
When it comes to the choice and applications of resins, there’s a great deal to talk about, and over the forthcoming months, I hope to provide some useful tips and design advice that will help you in your quest for reliable circuit protection. To kickstart the resins series, I’m going to start by going back to some fundamentals to help circuit designers understand some of the essential properties of resins before deciding which is the most suitable for the task in hand.
How to select the correct resin for your application
Choosing the correct encapsulation resin is possibly the most critical aspect of the design process. It is imperative to understand where and how the finished unit is going to be used and what performance criteria are expected of it. It is best practice to draw up a list of the ambient or standard operating conditions that the unit will be exposed to, and then list what the extremes of those operating conditions are likely to be.
Another important factor for consideration is the duration of time that the unit will be exposed to the most extreme of operating conditions. For example, there is a vast difference between specifying a chemically resistant resin that can withstand fully permanent immersion in antifreeze, and one that only requires resistance to occasional splashes of antifreeze that are wiped clear after short periods of exposure.
Similarly, if an application reaches a maximum temperature of 150°C, but this only occurs once a day for a couple of minutes and the rest of the time the normal operating maximum is 90°C, then it is sufficient to specify a resin with a maximum operating temperature of, say, 100°C. Most polymeric materials will tolerate wider temperature excursions than originally quoted for continuous operation over short periods, similar to those seen in typical reflow profiles.
Other application requirements for consideration might include flame retardancy. Is UL certification essential as part of material qualification or is it customary to accept a manufacturer’s internal test report? For LED lighting assemblies, optical clarity and UV resistance is important. Information on changes to Correlated Colour Temperature (CCT), Colour Space (L*a*b*) and Total Colour Difference (delta E*), can be useful when qualifying a resin to pot directly over a PCB with LEDs and Lenses. Or perhaps a design engineer wants to protect their circuit design from potential IP theft, in which case it is better to select an opaque resin. RF communication is used in many industries, these communication devices can benefit from encapsulation resins with low loss tangent and low dielectric constant properties to provide electrical insulation.
Electrification in the transport industry requires high power density electrical components to sustain long ranges and high horsepower. In order to manage the heat generated by small, high power devices, thermally conductive encapsulation resins can effectively dissipate heat away from hot components to a heat sink to sustain long-term performance. There are several different thermal characterisation techniques including steady state and transient methods, each method gives some variety in results so it’s worth bearing that in mind when comparing literature from different manufacturers.
What types of resin chemistries are available?
Resin chemistries fall within three major classes: epoxy, polyurethane and silicone. Epoxy is the strongest and most chemically resistant of the three, but it is brittle, challenging if not impossible to remove for rework and is typically limited to operating temperatures of between -40°C and +150°C. Epoxy resins offer excellent adhesion to a wide range of substrates.
The tough and flexible polyurethanes are suitable for applications operating at lower temperatures. Typically, polyurethane resins are only suitable for applications reaching maximum temperatures of 110°C for long periods (though some can go to 130°C). The chemical resistance of a polyurethane resin is generally lower than that of an epoxy, but polyurethanes outperform epoxies in water and high humidity environments. Polyurethane resins are typically used in marine applications, where water penetration resistance is critical, and for applications subject to a high level of physical stress, such as the potting of accelerometers, or sensors embedded in road surfaces. If large temperature swings are expected over a short timeframe, then the flexible nature of the resin is advantageous as there is a low probability of stress cracking occurring.
Silicone resins have the widest operating temperature range (-50°C to +220°C) and when cured are the most flexible of the three resin chemistries. Their adhesion to certain substrates is poor, as is their chemical resistance, particularly to chemicals more commonly encountered in everyday use, such as alcohols, aromatics and ketones.
While they do tend to differ widely in terms of performance characteristics, all resin types have excellent electrical insulation properties across their respective temperature ranges. Resin chemistries have advanced considerably in recent years and there are now resins from leading suppliers, such as Electrolube, that exhibit properties and performance criteria often well beyond the normal boundaries expected for that resin type.
How much resin should you apply?
As a rule of thumb, the amount of resin that needs to be applied must be sufficient to cover the top of the highest component of the board, and the thickness of the resin layer must provide the desired level of protection. While most customers will determine the minimum thickness of resin layers for their particular applications by trial and error, the relevant technical data sheet will provide good guidance, and consulting your supplier will often help resolve a problem.
What are the key factors for a successful mix ratio?
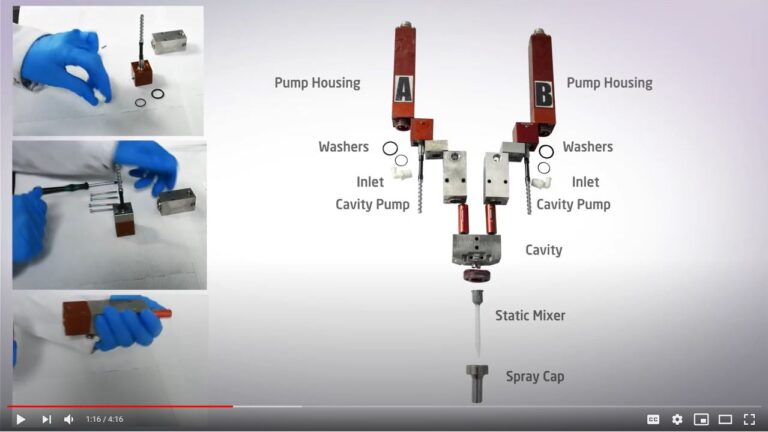
The mix ratio is quite possibly the most critical aspect of resin mixing. Brace yourselves to face long-term adverse repercussions if you get it wrong. There are two methods of mixing a resin with its associated hardener, either by hand or by using specialist dispensing equipment. If mixing by hand, then the ratio of the weight of the two components is the more useful method to employ. If mixing via dispensing equipment, then the volume ratio is used.
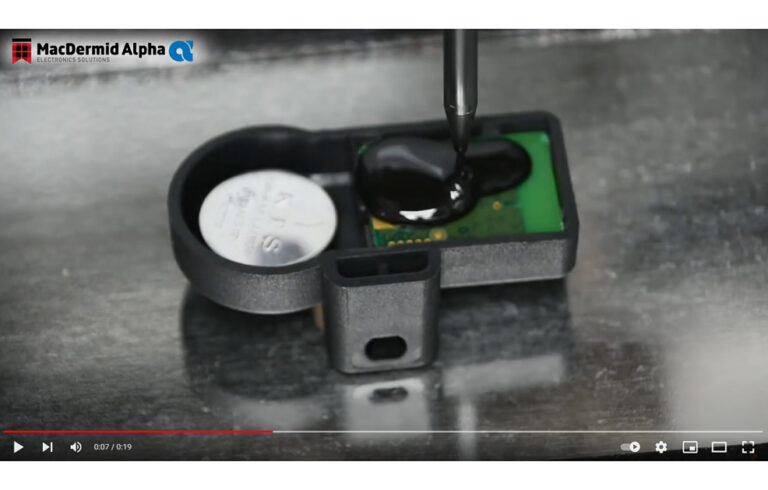
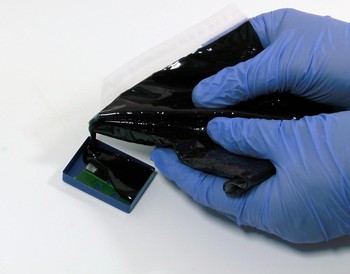
If the job is reasonably small, then you are likely to use a resin pack, which provides the resin and hardener in precise quantities, in separate compartments of the pack. When you are ready to use the product, you simply remove the clip or other separating device between the compartments and ‘massage’ the resulting pouch, ensuring that both components are completely mixed. For further support on mixing techniques, there is a ‘how to’ video in the Knowledge Base section of the Electrolube website. For larger production jobs, the resin and hardener are supplied in separate bulk containers, suitable for use with two component metering and mixing systems. It is important to check the shot sizes for each component regularly to ensure that the correct amounts of resin and hardener are being dispensed.
When mixing bulk resin and hardener, it is important to avoid introducing excessive amounts of air, which will form micro-bubbles within the cured resin. The liquid resin and liquid hardener used for polyurethanes are particularly sensitive to moisture, so it is important to avoid humid conditions when potting to avoid micro-bubble formation. These micro-bubbles may expand when hot and create voids. If you are not happy with bulk materials mixing and incurring the potential problems of introducing too much air (and moisture) into the mix, then it might be more appropriate to use automated metering and mixing equipment, which will accurately mix resin and hardener in the correct proportions, and usually in an inert atmosphere.
Remember: incorrect ratios will lead to a poor cure and the physical properties, tensile strength, elongation and modulus will differ from those specified in the manufacturer’s data sheet.
Important Considerations for Cure temperature
Once a resin and its associated hardener are mixed, the reaction can be very fast but also very exothermic, which can lead to the possibility of a runaway reaction, remember that the exotherm will also increase as potting volume increases. Not all reactions have a high exotherm, the exotherm temperature can be controlled by adjusting the chemistry or by using a filled system, as the fillers absorb some of the heat as well as reducing the concentration of the active component within the hardener that promotes this rapid cure. Controlling the temperature during the cure profile is important because the components requiring potting or encapsulation might be adversely affected by raised temperatures. It is important to follow the recommended cure profile to ensure resins are fully cured and the physical properties achieved match those specified on the manufacturers datasheet.
I hope the above points have been useful and informative. Please do contact our technical support team if you need any advice with your resin application requirements. In the meantime, please do look out for my next column, where I will be examining resins in more depth. For further information, please feel free to contact the technical support team via our website or chat.

