Dispelling the Myths of 2K Conformal Coatings
Following the launch of our 2K series of Conformal Coatings, we have often been asked, “So, how do they work? What are the differences between applying 2K coatings versus traditional solvent based materials?”
To answer this, plus other very frequently asked 2K questions, we have created a series of videos to dispel the myths surrounding areas such as production set up and the application of 2K material. This illustrates how easy it really is to transition to 2K materials.
The first video in this series is now available to watch and covers the basics of how a 2K applicator actually operates.
So, which valves are required for application of 2K materials, and how do they work?
PVA, Nordson Asymtek and Mycronic have specialist 2K valves available which can be retro-fitted to existing production lines. These are The Nordson Asymtek AM range, PVA VPX-2KS and Mycronic MYC50.
Your machine manufacturer will provide you with technical support and assistance with the initial installation of the valves and most technicians familiar with the PVA, Nordson or Mycronic machines should have little trouble assembling them.
This being said, we wanted to briefly cover how the valves worked so as to give you a better understanding of some of the elements to come later in this series, and to highlight the key differences that technicians will need to be aware of both during production and during maintenance.
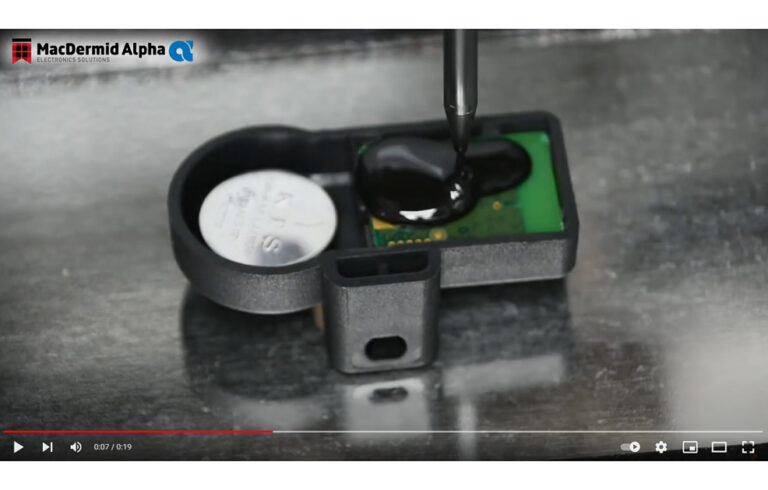
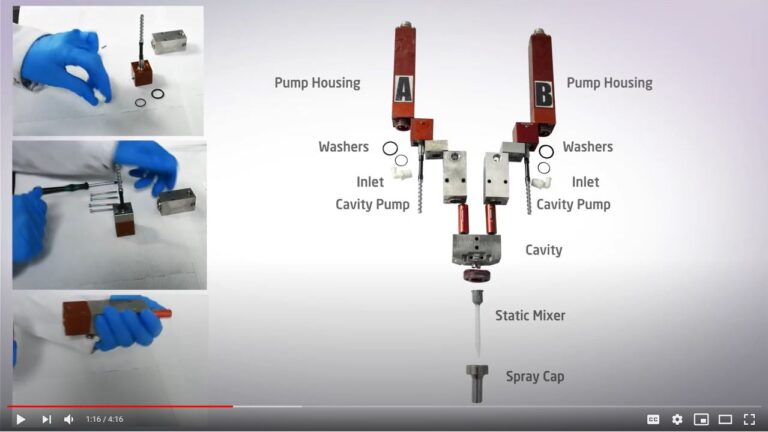
All the valves essentially work in an identical way; material is fed into the valve as 2K Coating, (referred to as Part A) and the Reaction Agent (referred to as Part B). This can either come from cartridges in the machine as we have here, or external reservoirs depending on the volume of production.
At the stage where material enters the valve, there is really very little difference compared to a normal solvent applicator other than there are two inlets side by side, as opposed to a single valve. However, as the material moves down the valve, it enters into a progressive cavity pump (effectively a helix screw). This consists of a series of cavities, and with each turn the material passess from one cavity to another (hence progressive cavity). The pumps can be spun at different speeds, to accurately control the flow of the two material parts. By selecting the correct speed for each individual pump, the mix ratio of the material can therefore be controlled. The mix ratio is controlled entirely by settings within the software making it easy for the operator to adjust accordingly for different 2K materials. Please refer to the product Technical Data Sheet for the correct mix ratio. The material then passes into a static mixer which, via a series of mixing elements, combines the part A and Part B mixing them together before dispensing.
Finally the material passes through a spray cap which attaches over the mixer. This uses compressed air to atomise the material as it is dispensed, allowing it to be sprayed over an area rather than dispensed in a single line.
So to recap, the key differences compared to solvent coating applicators are the twin progressive cavity pumps, and the static mixer.
Once the 2K material is combined in the static mixer, the curing reaction will commence. This means that unlike solvent coatings whereby you can drop the valve into solvent during line stop to prevent curing, with the 2K material this is not an option. Instead, the material should be purged from the static mixer during idle times. However, the static mixer has been designed to be easily replaceable with a simple interlock system so that if material does cure, or there is an extended idle time, you can simply change the static mixer when you are ready to continue. We generally would not advise material be left in the mixer for prolonged periods of time however.
The Static mixer is the cheapest and easiest component to change should you face blockages and should always be your first port of call should you get any problems during dispensing. It is highly unlikely that blockages should occur higher up the valve as the reaction agent and coating components are separate until they reach the mixer.
Electrolube have worked closely with both PVA ,Nordson and Mycronic to develop these valves to ensure they are suitable for our 2K materials and are happy to offer any further assistance required.
How does set up and calibration differ from traditional solvent coatings?
Following the installation of the 2K valves on your machine, the set up and calibration of the machine will be slightly different to what you may be accustomed to with solvent based coatings.
The first and most important thing to remember with 2K materials is; purge, purge and purge again! As soon as there is material within the static mixer the reaction agent will begin to respond and cure the coating. If the material is left in the mixer for prolonged periods it may begin to block the mixer. By purging regularly at each stage of calibration, you will ensure that any cured material in the machine is flushed through thereby ensuring a desired effect from the coating process.
So, how does 2K material set up differ from traditional solvent coatings?
The settings you will need to consider when calibrating your applicator for 2k materials are; air pressure to the material, air pressure to the spray cap and finally the temperature that you would like to heat the material up to.
Air pressure for both the material and spray cap is something that you will probably be accustomed to, as these are also standard considerations with solvent coatings; the only difference here is that you have two settings, one for the coating and one for the reaction agent. These should be set to the same Psi for both components and we would usually recommend somewhere around 25-30Psi, however this will vary depending on which 2K material you are using. Your technical sales or support representative will be able to help you to determine this figure should you require it.
The next consideration is for the air pressure for the spray cap. Again you should be familiar with this, and we would usually recommend around 3.5Psi, but this will vary with different 2K material. It is also worth highlighting at this point that the position of the spray cap on the machine is important to achieve desirable results. For example, in our Research and Development laboratory using our PVA Delta machine, we have found that when installing the spray cap, if you screw it fully into place, then unscrew by three full turns this will generally give you the best results. A metal shim can be made to ensure that this is accurate, check with your machine manufacturer to see if they can supply this for you.
Finally we have the heating valve temperature, should you choose to use it. This is something that is not relevant to solvent based coating so may be new to you. When using 2K materials it is advisable to heat the valve. This is because the 2K materials are thicker than traditional solvent coatings, so by applying heat, you ensure that the material flows well throughout the valve. We will demonstrate the possible effects of cold material in the trouble shooting section later in this series. Usually we would set this to around 60˚C but this can be adjusted dependant upon the ambient temperature in your location or material selected.
It is important to note that if you are using the heating valve, a thermal interface material, such as Electrolube HTSP, should always be used to ensure that heat is transferred both efficiently and therefore evenly, from the heating block to the valve. Your machine manufacturer will run through this during the set up phase and will illustrate how best to apply the material. Your technical support representative will also be able to provide additional support.
If you do not use a thermal interface material, it may result in uneven heat distribution to the valve and as a result the 2K material in the valve will behave with unpredictable results. For more information on how thermal interface materials work, please check the Knowledge Centre on the Electrolube website
Unlike traditional coatings, it is worth noting that once you have completed this set up, these settings should not be altered. Any further calibration should be completed using the settings within the program.
Calibration:
Your machine supplier will run through the details of how to calibrate the machine with you, however we wanted to give you a quick overview to highlight the similarities and differences compared to traditional coatings. As an example, we are using the PVA Delta, but the Nordson set up is very similar.
The key difference with 2K materials versus traditional coatings is the set up within the program itself. You will notice that in the video we are using our PVA machine as an example and that there are additional tabs for the 2KPS valves, with options for the coating only, reaction agent only, or mixed material. There is also the all-important purge button.
Additionally, there is a new tab, in this instance called VPX that includes all the important information regarding the material such as the mix ratio, flow rate and temperature. Unlike traditional coatings, the flow rate should always be controlled from here, rather than adjusting the micrometre. The mix ratio is a new addition. It is the ratio of coating to reaction agent required and can be found on the technical data sheet of the product you are applying.
Purge. I know we have already mentioned this, but regularly purging the static mixer will ensure a smooth flow of material and prevent blockages.
Thanks for watching, stay tuned for the next episode.
Spray Pattern Set Up And Trouble Shooting
Spray pattern set-up is essentially identical whether it be a 2K material or a more traditional coating, and technicians should have no trouble adjusting to using 2K materials. The only key consideration is the line spacing. Traditionally, solvent-based coatings are applied with a minimum spacing between coating lines (usually placed next to each other without overlap) relying on the low-viscosity and surface tension of the fluid to avoid coating misses and reduce the applied film thickness.. With spray materials in general, and 2K materials in particular, the materials are less likely to flow. It is therefore important that there is an overlap between sprayed lines, (usually 40-60% dependent upon height of components being sprayed). It is also important to remember that if there is material in the static mixer during programming, each and every time the machine stops you must purge the valve before continuing.
How quickly can I move the board once sprayed?
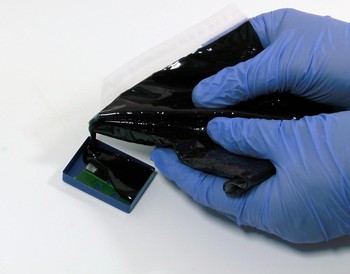
One of the major benefits of 2K materials over solvent coatings is that you can handle the boards immediately after application. This even allows you to turn the board over and coat the underside of the board within seconds of coating the top.
Why does the material splatter?
Purge Purge and Purge again!
If you find that the material is splattering when it is applied, there are several possible causes. The first port of call should be the static mixer. If the mixer has been used previously and been idle for more than 10 minutes, it is possible that material has started to cure within the thread. Try purging the mixer for a few seconds to clear this blockage. If this does not work you may need to replace the static mixer.
To Heat or not to Heat?
The next possibility is that your material is not hot enough. We would usually advise that you utilise the valve-heating function, especially on filled systems. By heating the valve assembly, the viscosity of the material is significantly reduced, which enables the applied air-pressure to spray the material more efficiently, with minimal overspray and excellent edge definition. You can further improve the efficiency of this heating by applying a thin layer of thermal interface material such as Electrolube’s HTCX between the valve assembly and the heater-block on the machine.
What is the best setting for air pressure and material flow
For a given material flow-rate there is a wide continuum of atomising pressures that can be used. However, as the atomising air pressure is increased, then over-spray becomes more and more apparent. If the atomising air pressure is insufficient, then the material will just drop out of the end of the spray cap in a quasi-dot dispense pattern. It is worth highlighting here, as per our mention during the set-up phase, the flow rate is always adjusted via the programming. The progressive cavity pumps control the flow rate of the fluid. Below a certain level of pressure on the reservoir, there is a chance that the flow rate of material to the cavities will be insufficient, potentially introducing voids or air bubbles, or reducing the volume of material to atomising pressure resulting in overspray. Above the level at which you ensure the cavities are filled, there is no benefit in increasing the reservoir pressure whatsoever, you simply risk forcing air into the system, or discovering the mechanical weak points. 15-30 psi is the usual, recommended range for all materials..
What if the mixer becomes blocked?
It is unlikely that blockages will occur higher up than the static mixer. Until the reaction agent is mixed with the coating it will not cure quickly, therefore blockages will almost certainly be in the static mixer. The mixeris disposable and has been designed for easy replacement.. The progressive cavity pumps are equipped with pressure transducers that sense back-pressure build-up to prevent mixed-material backing up into the cavities. The machine will error out rather than attempt to dispense material, resulting in the blockages causing any significant damage.
How long can I leave the machine with material in place?
Due to the fast curing nature of the 2K materials, we would not advise leaving material in the machine for prolonged periods. If the line is due to be stopped over the weekend for example, we would recommend that you purge the pumps of material and clean down the pump. For shorter stoppages, simply purging the machine for a few seconds and/or changing the static mixer should be sufficient.
Hopefully we have covered all of your questions here, but if you have more please don’t hesitate to get in touch with our technical support team who will be more than happy to help.
Don’t forget to join us for the final episode in the series – How and when to clean down you machine.